Like every type of animal enclosure, pig pens are designed to provide each animal with the space, shelter, water, and food they need to be happy and healthy. If you are wondering how to build a hog pen, read on to learn more!
For any kind of DIY pig pen, you need to consider the size, materials, shelter, food and water access, and space for wallowing.
Size
What size should my DIY pig pen be? To answer this question, it is important to specify the number of pigs that will live in the pigpen. Generally, each animal needs about 8 x 16 feet of space, although this will vary by breed and the size they will reach during their time in the pen. To ensure all of the animals have enough space, it is a good idea to plan for 2-3 more animals than the quantity in your herd.
Materials
It is crucial that the pig pen is made of sturdy materials that can withstand the activities of the animals. Pigs scratch against fence posts, try to reach through holes to touch things on the other side of the wall, and chew on any available wood. If any wood posts are accessible to the pigs, they need to be covered in wire mesh to discourage chewing. Metal posts are more expensive, but ultimately sturdier and longer lasting. The metal posts should be at least 6 feet tall so they can be anchored at least 2 feet in the ground. For the DIY fence, hog panels are the best choice.
Shelter
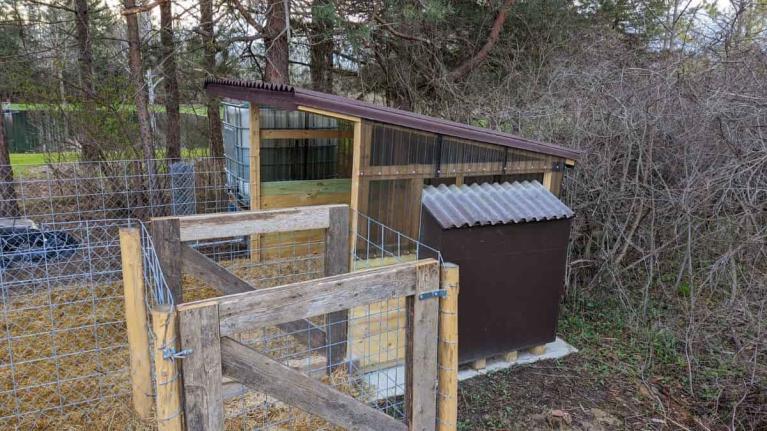
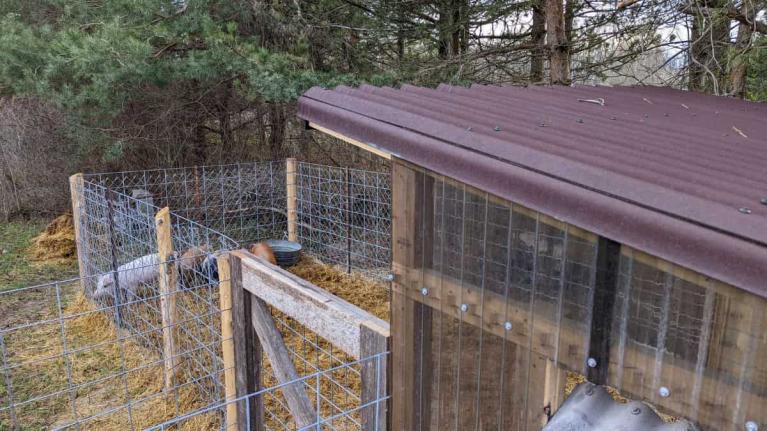
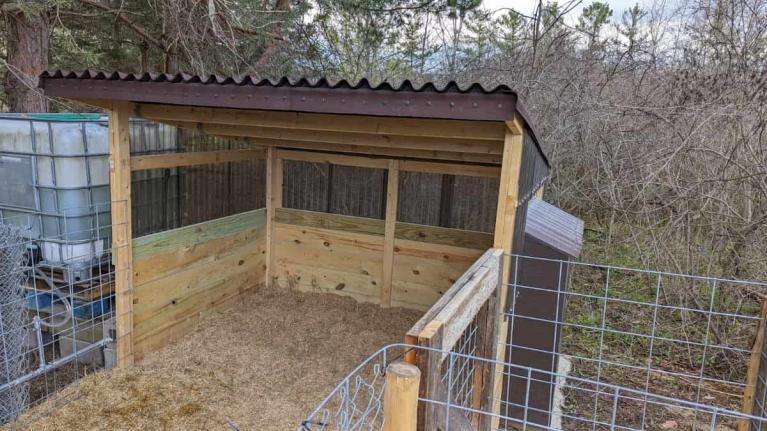
Within the pig pen, the animals need a covered, insulted space to shelter from the elements. The shelter does not need to be very tall, 4’ is sufficient for most breeds, but the footprint needs to be spacious enough for all of the animals to get out of bad weather. For DIY pig pens, a popular solution is a shelter with walls made of a layer of wire mesh, then plywood, then fiberglass insulation, then another layer of plywood, and then a final layer of wire mesh. Finally, the structure is topped with an ONDULINE® roof.
Food and Water Access
The best feeders are top-filling and automatic because they store large amounts of food but only allow a small amount of food to be available at a time. This prevents mess and waste. Automatic waterers are also helpful, but they do require connection to a water hose.
Space for Wallowing
Pigs love to cool off in a cool, wet, muddy area. Make sure to include an area for pigs to play, relax, and lower their body temperatures.
DIY Pig Pen Design Ideas
Onduline is a leading source of diy inspiration and materials. Check out these sturdy, and durable DIY pig pen ideas:


Tools & Materials for Building a Hog Pen
Materials
- Metal posts at least 6 feet tall
- Hog panels
- Plywood sheets
- Fiberglass insulation
- Wire mesh sheeting
- Wood screws
- Nails
- ONDULINE® ONDURA® roofing sheet
- ONDULINE® screws
- Top-filling, automatic feeder
- Automatic waterer
- Water hose
- Cement (optional)
Tools
- Drill
- Hand or circular saw
- Hammer
- Pencil
- Measuring tape
- Sand paper
- Staple gun
- Work gloves and protective goggles
- Level
- Shovel
Steps in Building a DIY Pig Pen
While DIY pig pens come in a few different shapes and sizes, there are a few critical steps involved in building a basic, sturdy pig pen.
- The first step is to select or create your design. Take note of the measurements, all necessary tools and materials, and the quantity of materials needed.
- The second step is to acquire all the tools and materials needed for the project.
- Dig the holes to sink your metal posts into the ground. Position the posts inside the holes and fill the space with dirt, gravel, or cement.
- Connect the hog panels to the posts to create an enclosed space.
- Once you are ready to begin the construction of the shelter, measure (twice!) and cut the plywood, insulation, and wire mesh pieces needed for the building.
- Assemble the wall panels and attach them to the metal posts.
- Once the sides are erected, it is time to add the roof. For a quick and easy installation, follow the Ondura Premium Installation Guide.
- Finally, celebrate the completion of your DIY pig pen with a grand-opening ceremony. Invite your pigs to your shelter and allow them to enjoy their new home for wallowing, play, feeding, watering, and protection from the elements!
Now you know how to build a pig pen! For more DIY inspiration and materials, visit the Onduline site today.