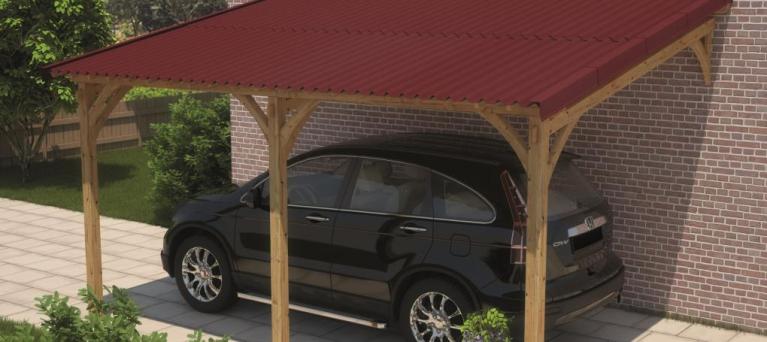
Cars are significant investments and essential for many aspects of our daily lives. It is crucial that we protect our cars as much as possible. If a vehicle is left in the elements, sunshine, bird droppings, acidic rain, and tree sap can deteriorate the exterior of the car. Building a DIY carport is an affordable way to add protection to your vehicle and keep your car looking nice.
Why DIY Your Carport
If you hire a professional to complete a home improvement project, the labor costs will likely be the most expensive part of the job. If you build your own carport with friends or family, you can save thousands of dollars. A carport is a relatively simple structure so it is a great option for a DIY project. Plus, building a DIY carport can be a fun and satisfying experience.
Quick tip: Remember to check your local zoning laws to find out if you need a permit to build a carport on your property.
Popular DIY Carport Designs for Inspiration
When browsing carport designs to choose the one that is right for you, consider the number and size of vehicles that you need to store, whether or not you need storage, and where you want to locate your carport on your property. Let’s get some inspiration from a few popular DIY carport designs.
Carport with Storage
This free carport design includes space for a single car as well as a storage solution attached to the back. The creator recommends using weather-resistant lumber, such as pine or cedar, for the carport frame. We recommend using ONDURA Premium Series 10 corrugated roofing panels to provide the most protection for your vehicle. The panels are available in 4 pleasing colors. They are easy to install, and they will help your car stay cool in the heat of the summer.
.
RV Carport
This free carport design is sized to fit an RV, large truck, or boat. The trusses are designed to be extra sturdy. High-quality materials such as cedar, pine, or redwood are recommended for the structure. If you want a roofing solution that is more affordable and easier to install than the tar paper and asphalt shingles, consider the ONDURA Premium Series 9 bitumen panels. The panels are easy to install, durable, and resistant to corrosion. Additionally, they will keep your vehicle cooler on sunny days.
Lean-to Carport
Do you enjoy sprinting from your car to the door of your house with arms full of groceries during a heavy rainstorm? Of course not! This lean-to carport design ensures your path to and from the house is as short as possible and completely shielded from the elements. This design is both practical and visually pleasing. Plus, there is a lot of room to add your own style. Continue reading for a material list, tool list, and step-by-step guide for how to build a carport.
Tools & Materials for Building a Carport
Materials
- Concrete footings
- Concrete
- Joist hangers
- Gutter and downspout
- Wood screws
- Nails
- ONDULINE® ONDURA® roofing sheet
- ONDULINE® screws
- Pressure-treated 2x4 wood planks
- Pressure-treated 4x4 wood posts
- Ground cover (optional)
- Wood stain or paint
Tools
- Drill and drill bits
- Miter saw
- Jigsaw
- Hammer
- Pencil
- Measuring tape
- Sand paper
- Work gloves and protective goggles
- Level
- Paint brush
Steps in Building a Carport
- The first step is to select or create your design. Take note of the measurements, all necessary tools and materials, and the quantity of materials needed.
- The second step is to acquire all the tools and materials needed for the carport project.
- Prepare the ground that will be beneath your carport. Identify plumbing, gas, and powerlines to determine a safe location for your carport.
- Plot out the space for your carport. The average car needs at least 16 x 9 feet of space. Increase the size to accommodate multiple or larger vehicles.
- If desired, add a ground cover such as fine gravel to the carport space.
- Position the concrete footings in the appropriate locations, and raise the posts.
- Attach the beams and rafters to the tops of the posts.
- Install the gutters and downspout. Ensure the downspout leads to the nearest stormwater drain.
- Install the roof. For a quick and easy installation, follow the Ondura Premium Installation Guide.
- Stain or paint the wood components to create a nice, finished look and protect them from the elements.
- If you want to take your carport to the next level, you can add special features such as lights, planters, or other decorations.
- Now your carport is finished. Celebrate the completion of your DIY project by parking your vehicle under the carport!
Now you know how to build a DIY carport. For more DIY inspiration and materials, visit the Onduline site today.